ZFS File Server – First Hard Drive Failure

I experienced my first hard drive failure in my ZFS file server.  I noticed the drive had failed when the light on the front of my Dell Poweredge 2950 turned orange.  I immediately logged into the Freenas control panel to see what was going on.  I checked the drive status and one of the drives was marked as failed.

First I started by shutting down the server as even though the server chassis supports hot swapping hard drives, Freenas does not support hot swapping drives.   Once the server was shutdown, I removed the failed drive and wrote down the serial number in order to file a warranty claim with Western Digital.  Western Digital’s website made it very easy to file the warranty claim and within a few minutes I had an RMA number and a shipping label to send the drive to them.  I choice to ship the drive via UPS ground so it took about four days for it to arrive at the Western Digital Processing facility.  Within 24 hours I received an email stating that my replacement drive had been shipped.  It was another two days before I received the replacement drive.  After receiving the drive I placed it in the drive tray and screwed it in and put it back in the server.

I started the server back up but Freenas was not finding the drive.  After some troubleshooting I relived that I hadn’t passed the new drive through the raid controller.  ZFS prefers to have direct access to each drive so I pass each drive through the raid controller as raid 0.  After setting the drive to raid 0 in the bios and initializing the drive, I was able to now see the new drive in Freenas.  At this point the rebuild started and took about 12 hours.  Reading forms about this large of drives and the slow speed of the Western Digital Green drives made me nervous about the rebuild time but it was quick and I was surprised how smoothly it went.  After the drive was rebuilt, I went into Freenas and removed the old drive from the drive status page.  Freenas now displays that the array is no longer degraded and has a green status.

Lessons Learned:

  • Make sure to pass your drives through the raid controller otherwise Freenas can’t access them
  • Use zpool status command to view the status of the rebuild
  • Remove the old drive from Freenas after the rebuild has completed
Posted in Home Lab | Tagged , , , , | 7 Comments

pfSense – Router

pfSense is a great alternative to store bought, home routers.  The first reason being that home routers have a very weak processor in them and a very small amount of memory.  You are also locked down as far as what you can change in these routers.  Most of them don’t give you many options for customization.  Using pfSense you can install it on any old machine that you have lying around the house or you can install it on a newer machine if you need more network throughput or you want to do a lot of customization.

I decided to install it on some newer hardware that way I could add more ram in the future without much hassle but I also wanted to be able to customize it and have it do more than just the basic router tasks.  Currently my pfSense box contains only 1GB of ram but that is huge compared to the 32MB or less that a Linksys router has.  My pfSense box also has a lot more processor power.  This helps to make sure there is no bottleneck when sending or receiving information from the internet.  It also allows me to run services such as DNS, DHCP, Caching, VPN and many other graphing services all on my router.

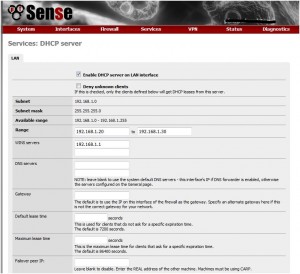
DHCP on pfSense is similar to what you would see on any other router.  It allows you to select the subnet that you would like to use for your network, set the range of IP addresses that you want it to handout and specify what you want the WIN and DNS servers to be.  One of the features that pfSense offers over other routers is the ability to have a failover.  This means that you can have two pfSense boxes and have one take over if the primary fails.  This may be overkill if you are home user but for a small business this would be a great feature.

Posted in Home Lab | Tagged , , | Leave a comment

pfSense – Installation

The pfSense installation can be completed in under 15 minutes and is very easy.  I decided to use a Dell Poweredge R200 that I had with 1GB of Ram and an 80GB hard drive.  This server had two built in NIC ports so it was perfect for pfSense.  During the installation you will be asked to select which port you want to use as your lan and which port you want to use as your wan.  I found the easiest way to do this was to start the installation with no ethernet cables connected to either port.  Then when you get to the part where you need to select which port is lan and which is wan you can just select the auto detect  option and plug them in as requested by the installer.  This is much simpler then figuring out what each of the ports is named.

After the installation is complete you can decide to what level of complexity you want to use pfSense.  I wanted to use it as my firewall, router, web cache and VPN server.  Along with these services I also wanted to be able to monitor the traffic that was flowing in and out of my network.  All of these features are built into pfSense and can be enabled simply by selecting the plugins.  In future posts I will go into more detail about how to set up each of these features.

Posted in Home Lab | Tagged , | Leave a comment